Installation Process
- Download VIM Theme
- VIM Theme Installation
- Installation via FTP
- Plugin Installation
- Plugin Installation & Update Notification
- Common Issues & Questions
Below we will describe step-by-step instruction of the VIM theme installation, will tell about several ways available, through web interface WordPress and with the help of FTP.
Download VIM Theme
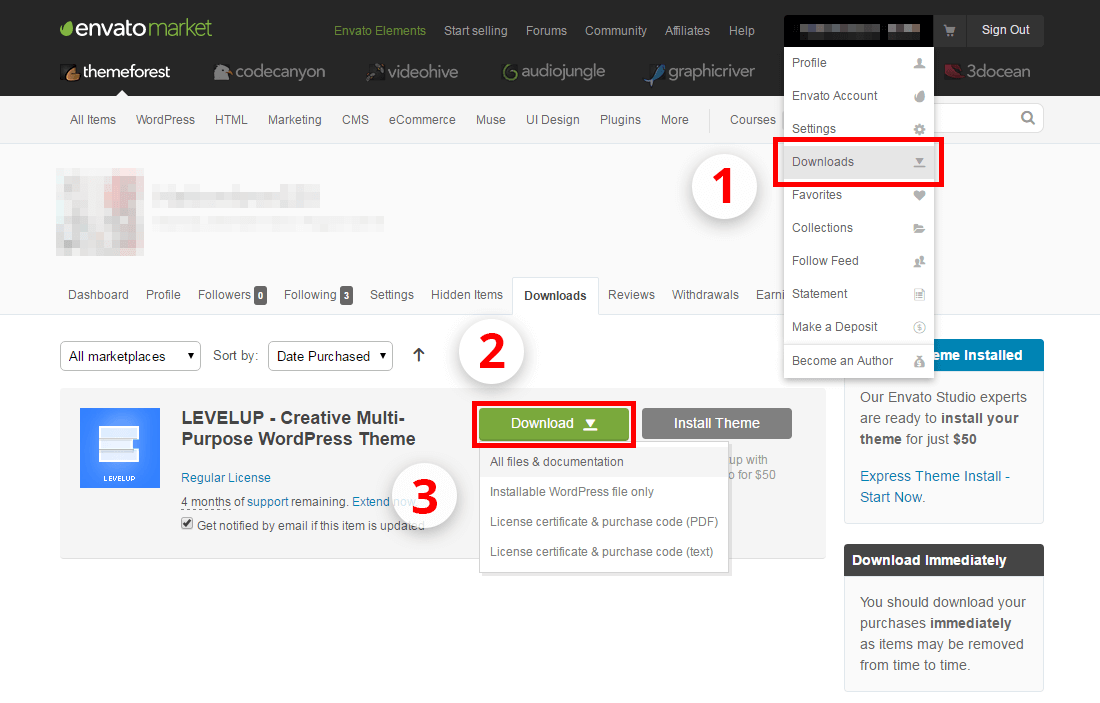
For the beginning you need to download archive with theme in the tab Download, when you are logged in the ThemeForest.

- All files and Documentation. This option will download a .zip file which will include the theme, all extensions, documentation and the licensing information.
- Installable WordPress files only. This option will just download the theme in a .zip format to your WordPress site.
What is in the downloaded archive?
- vim.zip - archive with WP VIM Theme inside.
- vim-child.zip - archive with child theme inside.
- Documentation – folder with documentation VIM Theme
- Licensing – folder with licenses
- Premium plugins which are included into the VIM Theme packet are development of third party companies (WPBakery Visual Composer), links to the documentations are below.
VIM Theme Installation
How To Install VIM using WordPress
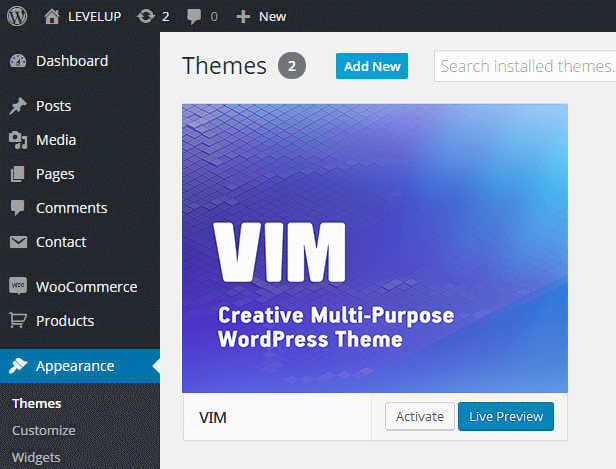
- Stage 1 - Go to Appearance > Themes.
- Stage 2 - Click on “Add New” and choose the "Upload Theme".
- Stage 3 - Go to find the "VIM.zip" file on your drive and choose "Install Now".
- Stage 4 - Make it active by going to Appearance > Themes and clicking the Activate button.

-
Stage 5 - Once VIM theme is activated, you will be redirected to the Welcome Screen with the notifications about the activation of the required plugins: VIM Core, and WPBakery Visual Composer. We are paying your attention that installation and activation of VIM-Core is obligatory, without this plugin the theme will be not working properly.
-
Stage 6 - Notification messages include the "Begin installing plugins" link to navigate to the Plugins tab with all required & recommended plugins you are able to install & activate.
-
Stage 7 - To start the installation process, please click on Install button on each plugin. Once the plugin is installed, the an Activate button becomes available to start the activation.
Installation via FTP
How To Install VIM using FTP
- Stage 1 - Log into your server with the FTP software.
- Stage 2 - Unzip the VIM.zip file
- Stage 3 - Upload the extracted VIM theme folder into wp-content > themes folder.
- Stage 4 - Activate the newly installed theme by going to Appearance > Themes and clicking the Activate button.
- Stage 5 - Once you activate VIM, you will be redirected to our Welcome Screen. You will then see a notification message to install and activate the required & recommended plugins: VIM-Core, WPBakery Visual Composer.
- Stage 6 - In the notification message, click the 'Begin installing plugins' button to go to the VIM Plugins tab where you can install and activate the required & recommended plugins.
- Stage 7 - Simply click the Install button on each plugin to start the installation. After you've installed them, an Activate button is available to make these plugins turned on and proceed with the setup.
Plugin Installation
Once the VIM theme is downloaded, you are able to install and activate: WPBakery Visual Composer. VIM-Core and WPBakery Visual Composer these are necessary plugins for theme functioning, they include all theme components, such as shortcodes, portfolio, etc. The Royal and are recommended plugins. Once VIM theme is installed, you get a notification about what plugins are the required and recommended.
Included Plugins With The VIM Theme
- WPBakery Visual Composer - a premium page builder plugin for WordPress.
Plugin Installation & Update Notification
Once VIM or update VIM is installed, WordPress notifies you with the messages letting you know to install or update the required and recommended plugins. Please follow these prompts to install, activate or update.
Common Issues & Questions
1. I am getting Site Crashes trying to activate the plugins This is not a theme issue but a server configuration issue. If it’s happening, please check the PHP configuration settings. To get more info, check out our Recommended PHP Configuration Limits .